Open for Lunch
Create Your Booking Link
Pick the calendar you already use, choose the times you’re open for lunch, and create a link you can share.
Which calendar do you use?
Choose one to jump directly to the instructions.
You only need one booking link.
There is no need to change calendars or create a whole new scheduling system.
Start with the one you already use.
Google Calendar
For people who already use Google Calendar or Gmail.
- On a computer, open Google Calendar.
- Click Create in the upper-left corner.
- Choose Appointment schedule.
-
Give your schedule a name.
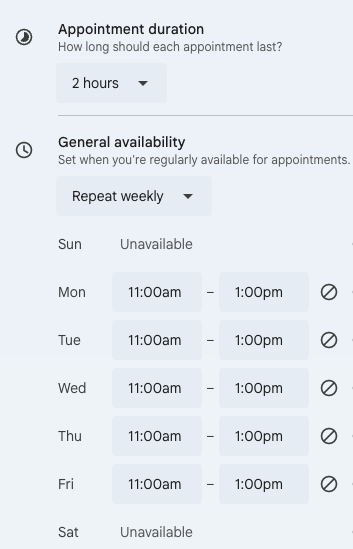
Example: Lunch with Jacqui - Choose how long you want to leave open for lunch.
- Under General availability, choose the days and times you are available.
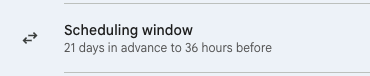
- Choose how far in advance someone can book and how much notice you want before a booking.
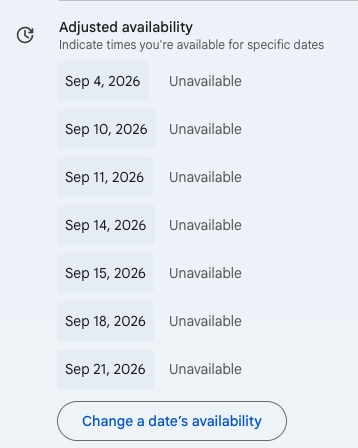
- Make sure Google is checking your calendar for conflicts so existing appointments block unavailable times.
- Click Next.
- Choose how you want to handle the meeting location. For Open for Lunch, in person or location to be arranged will usually work best.
- Add a short description if you would like.
- Review the information you want your lunch guest to provide.
- Click Save.
- Find your booking page and choose Copy link.
- Share your link and open a seat.
Before sharing:
Open the link yourself and see exactly what your lunch guest will see.
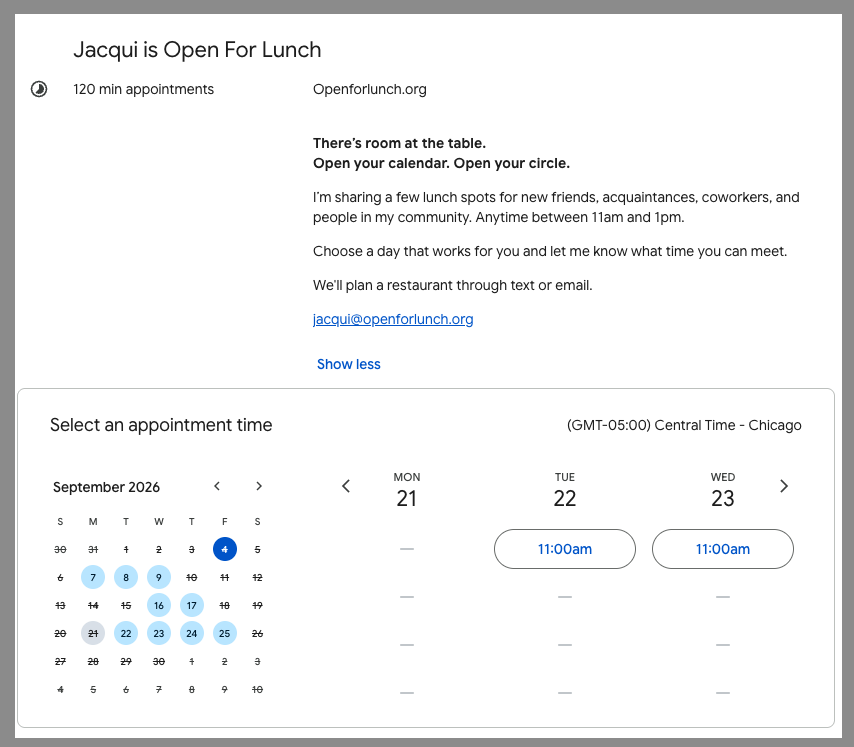
This is what my Open for Lunch booking page looks like to a guest.

Outlook / Microsoft Bookings
For people who use Outlook or Microsoft 365.
- Sign in to your Microsoft 365 account.
- Open the app launcher and choose Bookings.
- Create a booking page if you do not already have one.
- Open your booking page and choose Services.
- Select Add new service.
-
Give the service a simple name.
Example: Lunch with Jacqui - Add a short description if you would like.
- Choose the meeting location or indicate that the location will be arranged after booking.
- Set the length of the lunch.
- Choose the days and times you want to make available.
- Assign yourself as the person providing the appointment.
- Review your scheduling settings, including how much advance notice you want.
- Save the service.
- Go to your booking page and make sure it is published.
- Copy the public booking link and share it.
Helpful:
Microsoft Bookings can use your Outlook calendar to prevent someone from
choosing a time when you already have another appointment.
Calendly
For people who already use Calendly or want a separate scheduling tool.
- Sign in to Calendly or create an account.
- Connect the calendar you normally use.
- Go to Scheduling.
- Click + Create.
- Choose an Event type.
-
Give your event a simple name.
Example: Lunch with Jacqui - Choose the length of the lunch.
- Choose how the meeting location will be handled.
- Set the days and times you are available for lunch.
- Review additional booking settings such as advance notice and how far into the future someone can book.
- Save your changes.
- Return to the Scheduling page.
- Find your lunch event and choose Copy link.
- Share your link and open a seat.
Before sharing:
Make sure your regular calendar is connected so Calendly knows which times
are already unavailable.
Before you share your link
Take one minute to look at your booking page as if you were the person receiving the invitation.
- Your available lunch times are correct.
- Your name appears the way you want it to.
- The length of the lunch is correct.
- Your existing appointments block unavailable times.
- The meeting-location instructions make sense.
- You know how you and your lunch guest will decide where to meet.
You’re ready to open a seat.
Copy your booking link and share the invitation with your community. Sometimes connection starts with simply making room for it.

